


Turning prompts into five scalable workflows with Figma Weave


To build upon a visual language with AI, you need to harness the logic behind each prompt—building, editing, and directing how visuals come to life. Here, we share five creative workflows that show the breadth of what the Figma Weave canvas can do.
Share Turning prompts into five scalable workflows with Figma Weave
Note from Itay Schiff
We started Weavy, now known as Figma Weave, because we saw a need for a new paradigm in media production—one where you can combine AI models, shape every step, and scale your process, with the speed of AI and the standards of a professional workflow. We're excited to bring that to Figma users, and are working toward a deeper integration between our products later this year.
In the meantime, visit Figma Weave to get started.
Generating great visuals used to take a lot of time and specialized skill. Now it takes seconds. But generating the right visuals—ones that fit your brand, hold up across channels, and scale with your needs—takes more than a single prompt. It takes the ability to branch, explore, and build, connecting AI nodes together until every visual is exactly right. That's what led Figma to acquire Weavy Figma has acquired Weavy, a platform that brings generative AI and professional editing tools into the open canvas. As Figma Weave, the company will help build out image, video, animation, motion design, and VFX media generation and editing capability on the Figma platform.Introducing Figma Weave: The next generation of AI-native creation at Figma
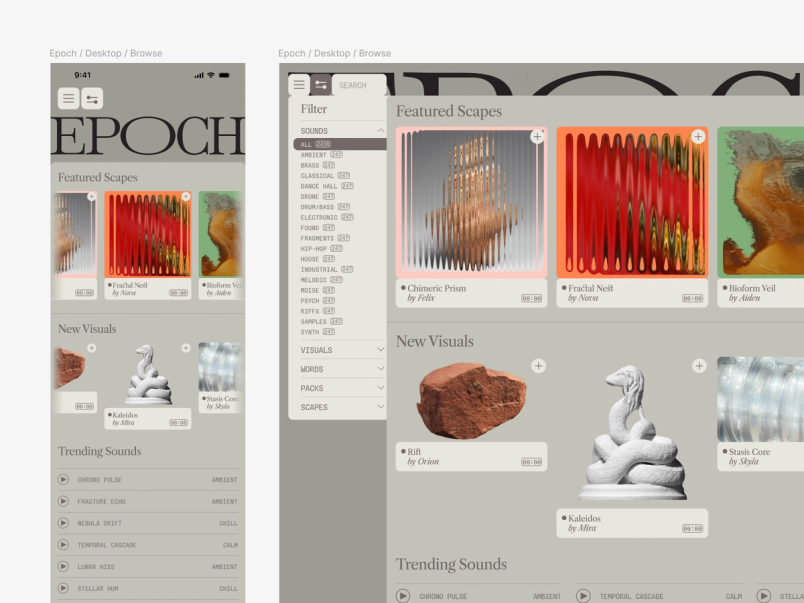
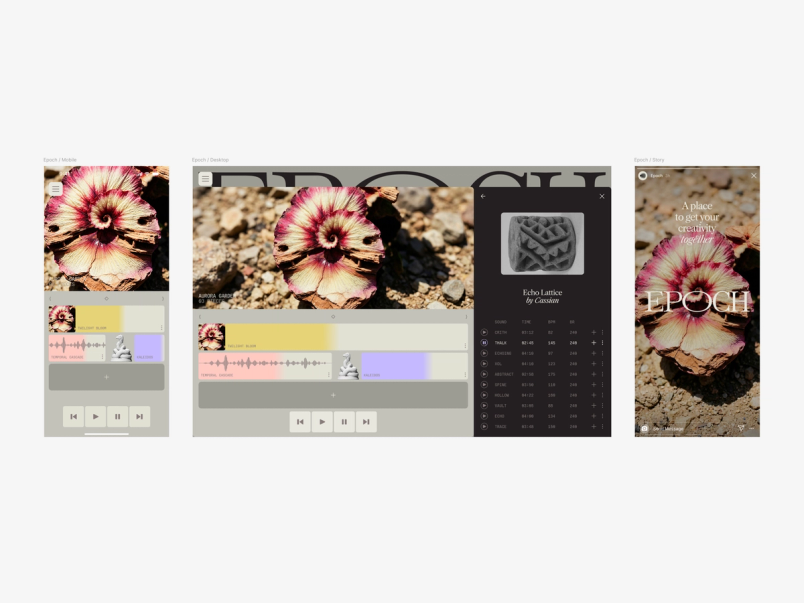
It's a new way of working, one where every step can be reshaped, reapplied, and built upon. To help you get started, we've launched workflow templates as a new resource on Figma Community. Explore these 20+ templates built by the Figma Weave team to turn images into videos, generate 3D models, combine reference styles, compare image models, and more. Below, we walk through five additional workflows in detail, building on one another using sample brand assets from Epoch—a fictional contemporary sound and video shop—curated to show the full range of what Figma Weave can do.

Weave tip
Prompting a model to combine two styles gets you one interpretation. Building it as a workflow lets you tweak the influence of each reference independently—tinkering with the balance until the blend is exactly what you want.
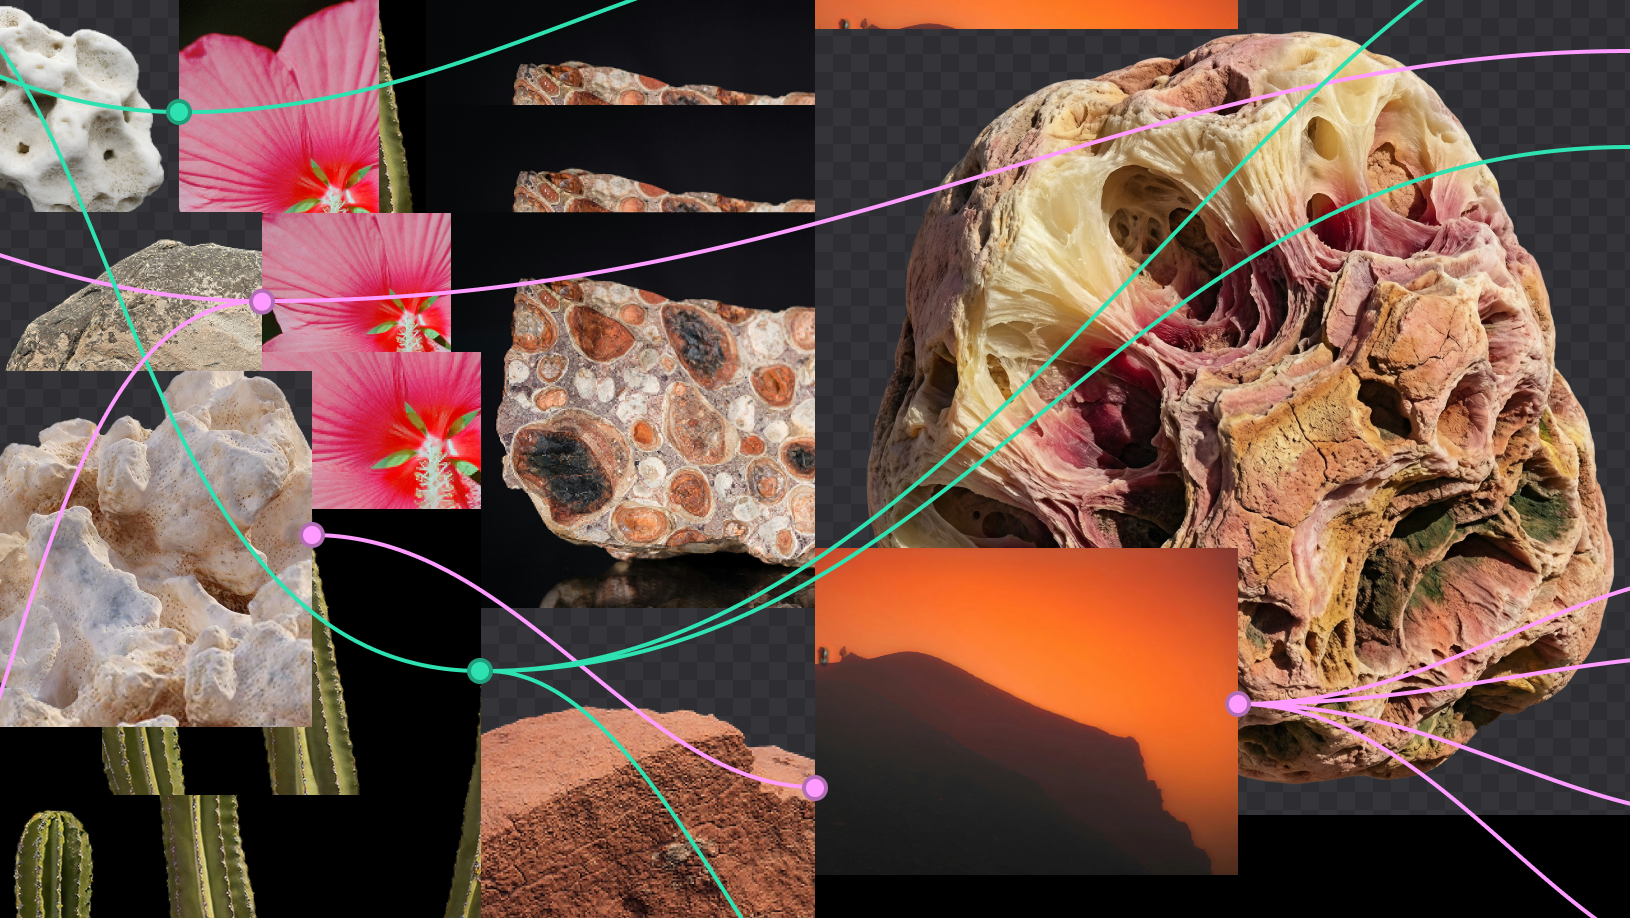
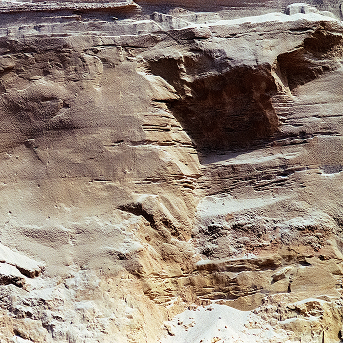
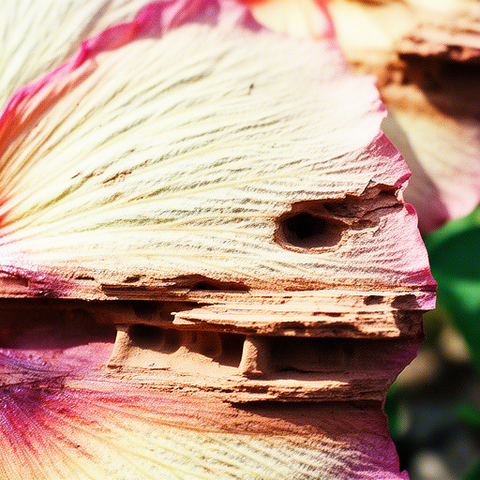
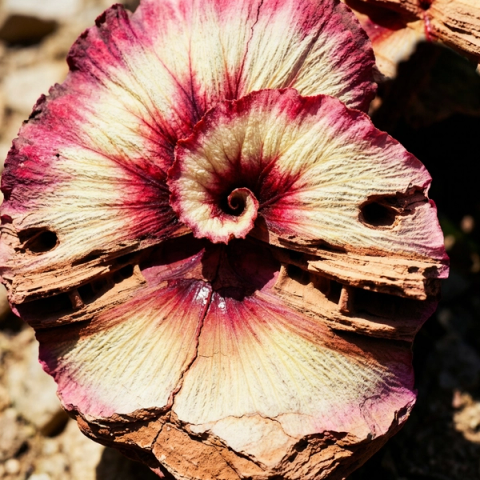
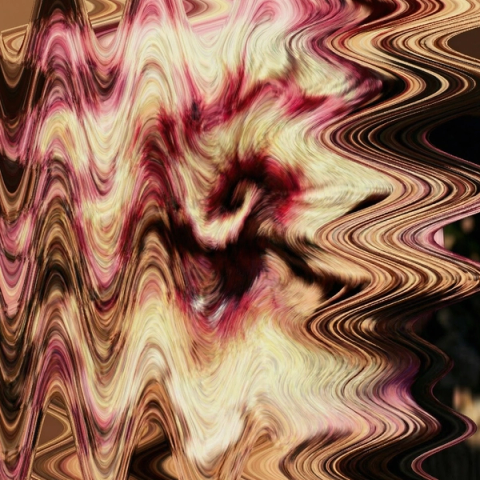
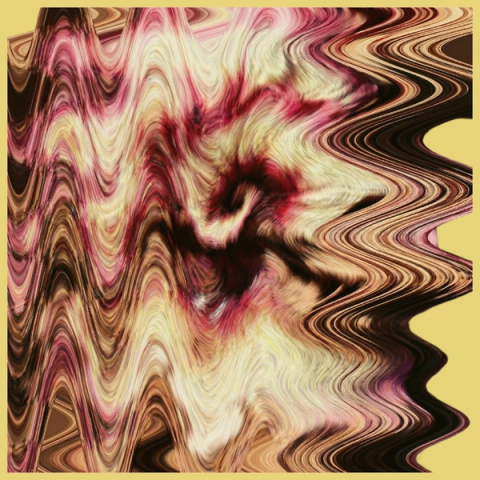
Workflow 1: Combining two images to define a new style guide
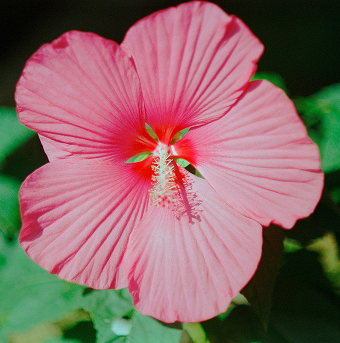
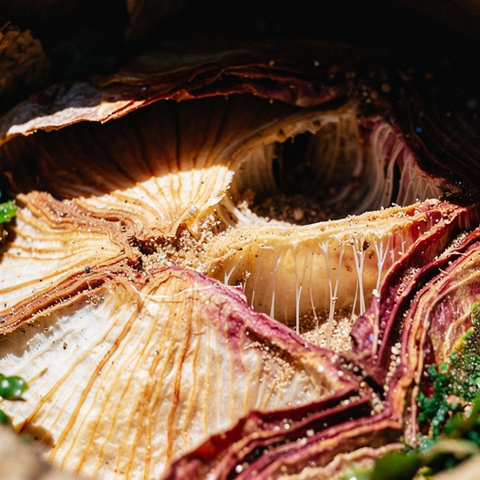
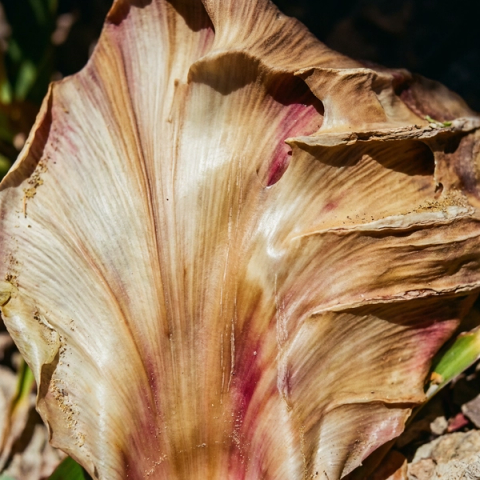
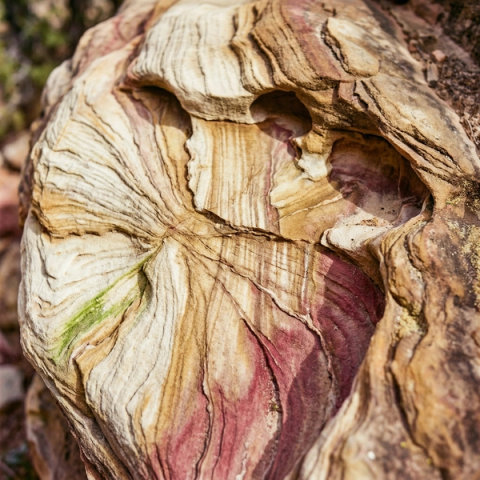
When you need new imagery that matches an existing aesthetic but a photoshoot isn't an option, the answer isn't to prompt from scratch and hope—it's to pull the style directly from what you already have. Here, we started with two of Epoch's reference images (a hibiscus flower and a rock face) and ran each through an Image Describer node on the Figma Weave canvas. The node analyzes an image and pulls out the key visual attributes that define its look, things like texture, color, lighting, and composition, and turns them into a written description you can edit and build from. We then combined the two descriptions into a single new style. We adjusted the balance of influence between the two until the blend felt right. Running the result across different image generation models let us pressure-test it and finalize the look and feel of the style at scale.
What we ended up with wasn't a prompt. It was a reusable style definition we could carry into every workflow that followed.
Try it yourself: Combine two of your own reference images into a new style.


Weave tip
Build this workflow once, apply your style to a new subject, explore variations to find the right asset, and let Weave handle the resizing across aspect ratios automatically. You focus on what looks right—the system handles the rest.
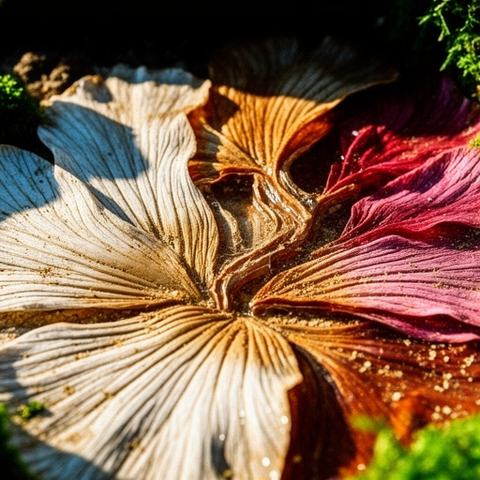
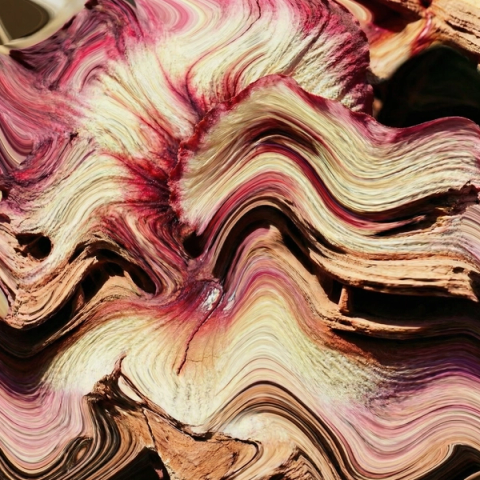
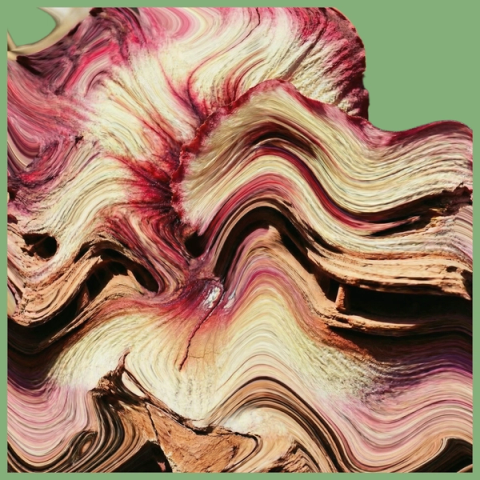
Workflow 2: Generating variations in multiple aspect ratios
Workflow #1 produced a set of style definitions—detailed descriptions of how an image should look, capturing texture, material, and mood. But having a style guide like that is one thing. Using it to generate something entirely new, with variations you can control, and then deploying it across channels at multiple aspect ratios, is another.
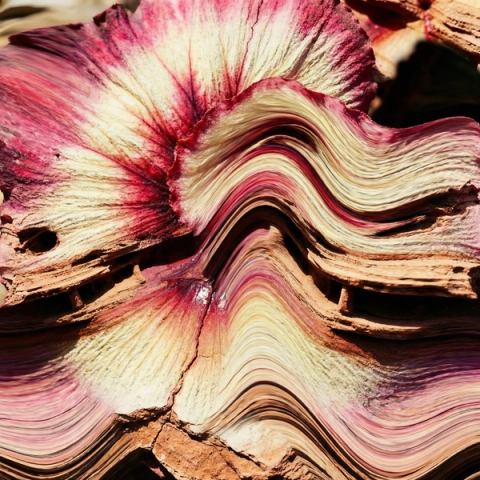
We gathered our favorite style outputs from workflow #1 and fed them into an Any LLM node—where you can choose any text model and give it instructions. In this case, we asked it to generate a master style description we could apply to a new subject. Epoch's brand draws on natural materials and textures, so we took the flower-rock style from the original references and applied it to a begonia plant—the material stayed consistent, the subject changed entirely, and the flower-rock style from the original references became the surface of the plant itself. That gave us six variations of plants, the same visual logic and different interpretations.
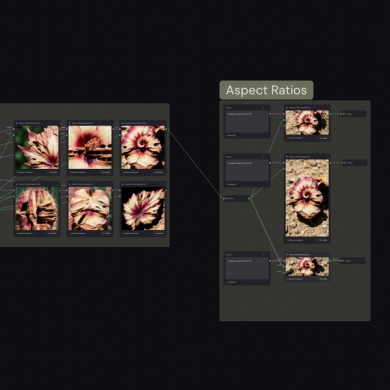
From there, the workflow automatically produced three aspect ratios from a single favorite: 1:1 (for a mobile product screen), 967x420 pixels (for a desktop product screen), and 9:16 (for a social post)—ready for Figma Design.
Try it yourself: Take your style guide further and generate on-brand variations at any size.


Weave tip
Applying effects one at a time can make it hard to compare options side by side. With Weave, run all your distortions against the same image in one pass, compare every variation at once, and choose with confidence.
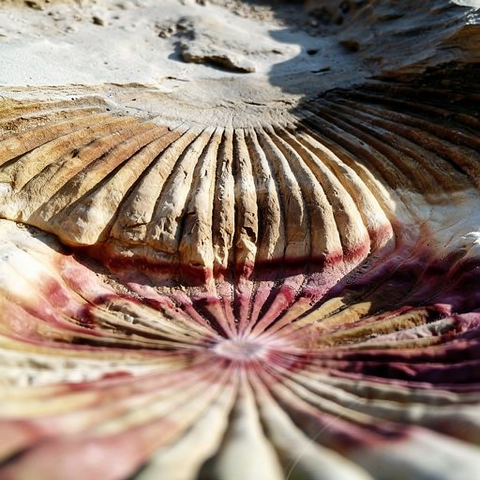
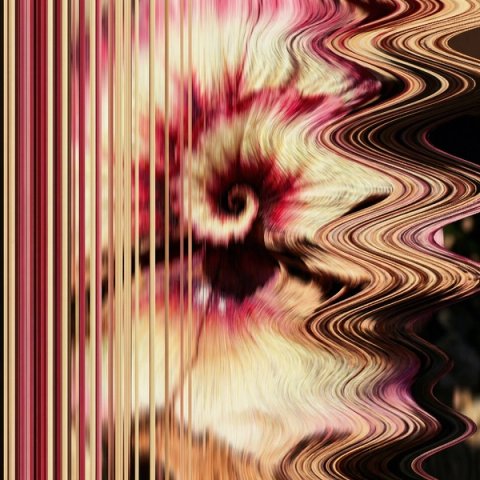
Workflow 3: Exploring multiple distortion effects
Epoch uses displacement and distortion as part of its visual language. Applying that effect consistently, and at scale, is where manual iteration gets slow.
We took the flower-rock-plant image from workflow #2 and Epoch's existing distortion references, then combined them to produce eight different distorted outcomes in one pass. From there, we removed the background and placed them on Epoch's brand colors to see which effect fit where.
The advantage isn't just speed, it's comparison. Epoch works with several different types of distortion, and running all of them against the same image—simultaneously—let us make a more confident call about which one suited the asset best.
Try it yourself: Apply multiple effects to the same image and find the one that fits best.


Weave tip
Prompting for multiple angles of an object gets you interpretations, not control. Generating three perspectives and running them through Rodin 3D V2 gives you a model you can rotate to any angle—so the composition drives the shot, not the other way around.
Workflow 4: Converting an image into 3D
Epoch's brand is grounded in physical, natural forms—rocks, plants, tactile textures—brought to life through distortion and 3D. But photographing physical objects means you're stuck with whatever angle you captured. Generating a 3D model instead gives you full control: Rotate to any angle, find the right composition, and lock it in.
Referencing some of the natural elements in Epoch’s branding—a leaf, a cactus, and three rocks—we generated a new white rock, then prompted a front, back, left, and right view of the rock. We then ran those through Rodin 3D V2 to produce a model we could rotate freely. We found the angle that worked for our composition and locked it in, ready to use as a still image or drop into a video output. No photographer, no reshooting, no compromising on the angle because that's just how the light was that day.
With our 3D model in hand, we had everything we needed to bring Epoch's homepage to life: the distortion from workflow #3, Epoch's existing brand elements, and a perfectly composed 3D form to anchor it all.
Try it yourself: Turn any physical reference into a 3D model you can rotate freely.
Weave tip
Once you're satisfied with your visuals, getting them into Figma Design is as simple as a download or copy-paste—with more to come as we work toward a deeper integration between the two products.
Workflow 5: Compositing elements into a video rendering
With a set of static assets in place, the last step is motion. Using the homepage from workflow #4, we pulled in a simple animation as a motion reference to drive the distorted image at the bottom of the page. The 3D rock, meanwhile, is controlled by the 3D node and a Kling Element node—giving the video model an understanding of the stone's angles to animate it independently. The final product was exported from Figma Weave and dropped back into Figma to be passed on to development.
Try it yourself: Animate your own elements and export a production-ready video.
Two reference images. Five workflows. A full brand system—including new images, videos, and 3D models—with no photoshoot. That's what building with Figma Weave looks like in practice.
We're working on bringing Figma Weave into the Figma ecosystem, with a full integration coming later this year. In the meantime, register for our livestream on April 16, 2026, and let us know what you build in the Figma Forum. For more resources on how to get started with your own workflows, visit the Figma Weave knowledge center or read more in our help center.